
How-To Guides
Your MyCSULB Student Center provides an easy way to access, view, and manage your student account information online. To learn more about your student account, login to the Single-Sign On Portal.
How-To View Your Student Charges Tutorial
Step 1:
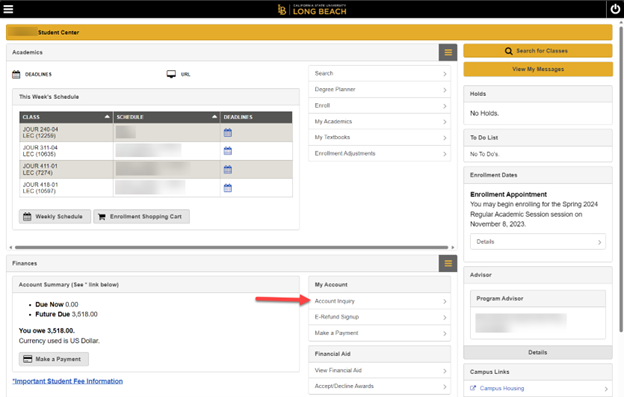
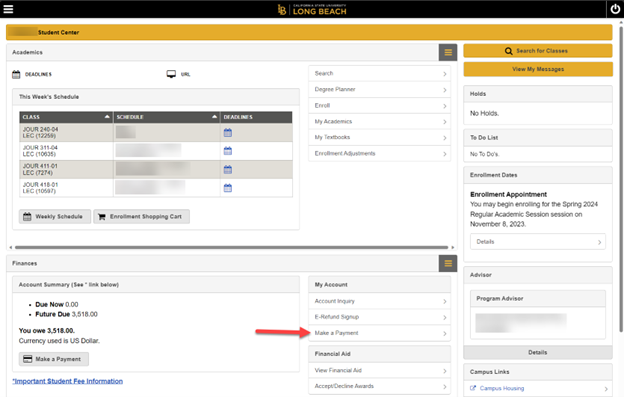
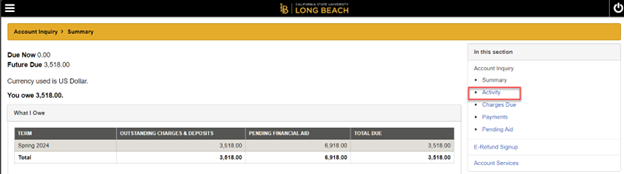
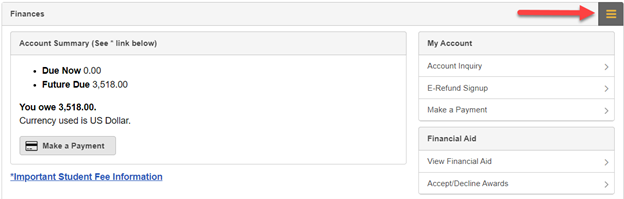
Select the "Account Inquiry" link below the "Finances" section of the Student Center.
Step 2:
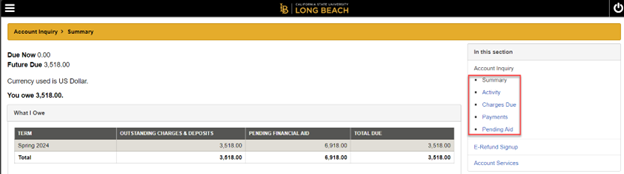
Click on one of the five tabs (summary, activity, charges due, payments, and pending aid) you wish to view. The “summary” tab displays summarized charges, payments, pending financial aid and due charges by term.
Step 3:
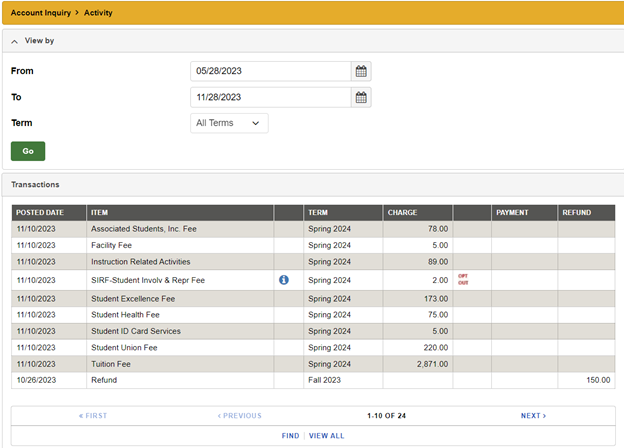
The "activity" tab lists all payments, charges, financial aid and refunds posted by date range and or term(s).
Step 4:
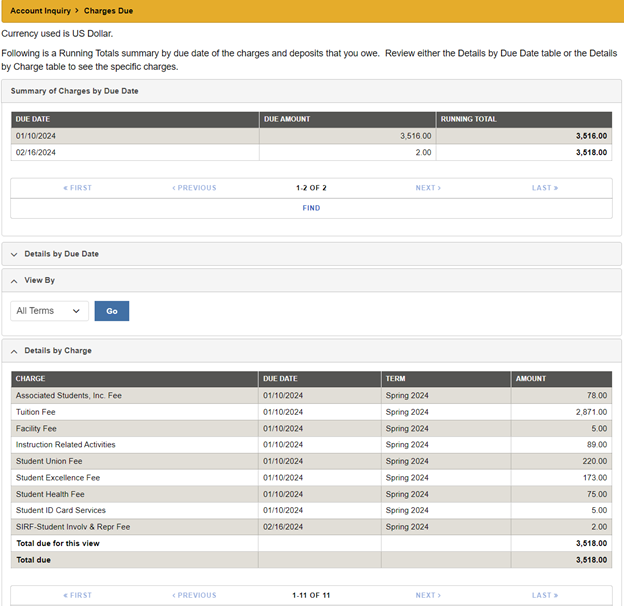
The "charges due" tab displays a summary of unpaid charges by due date.
Step 5:
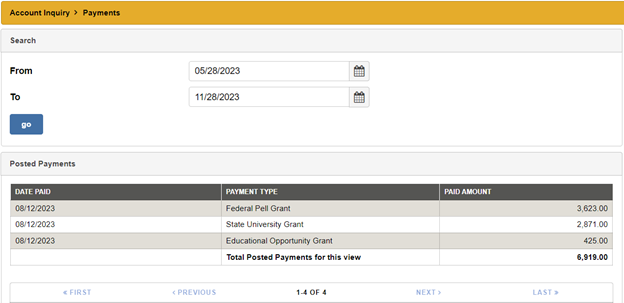
The "payments" tab lists all payments including financial aid posted on your account by date range.
Step 6:
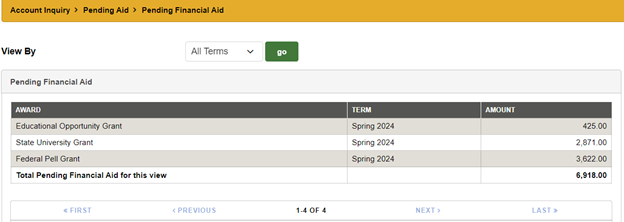
The "pending aid" tab can be viewed by one or all terms.
To print an itemized statement, please follow the On-Demand video tutorial.
On-Demand Video for How-To Pay Your Fees (SSO)
Step 1:
Select the "Make a Payment" link below the "Finances" section of the Student Center.
Step 2:
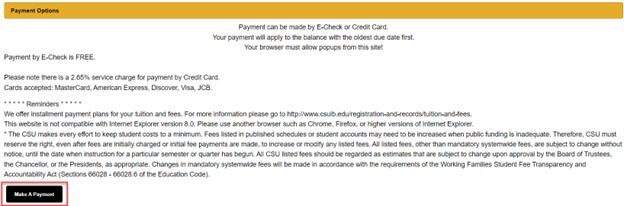
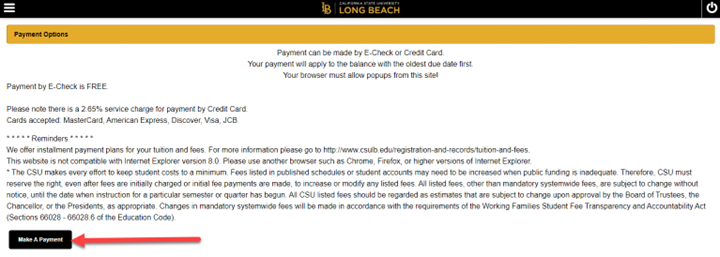
Click on the "Make a Payment" button
Step 3:
Select Make a payment

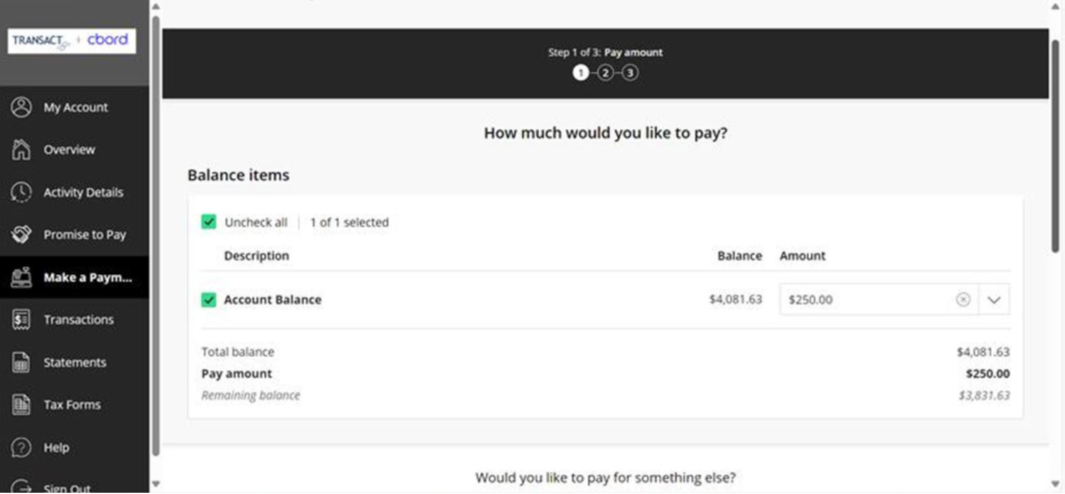
Step 4:Enter the amount you would like to pay. To pay the full balance due on a given due date, click the Balance button. To modify the amount, enter the amount you wish to pay in the Amount field. If you need to restrict your payment towards a specific charge, such as an Installment Plan Payment or Housing Payment, you may select those options in the lower half of the screen. When you have selected all items you would like to pay, click Continue.

Step 5:
Select a Payment Method. If you have saved previous payment information, you can select that form of payment, or you can enter a new credit or debit card, or a new bank account.

To pay with a new credit or debit card, enter the following information, then click Continue:
- Card number
- Expiration date
- Security code
- Zip/Postal code

To pay with a new bank account, enter the following information, then click Continue:
- Account holder name
- Account Type (checking or savings)
- Routing transit number
- Banking account number
- Confirm banking account number
- Bank account nickname (optional)

Step 6:
Confirm your information and pay. Enter your email address. To change the payment amount or the payment method, you can click on the “Change” hyperlinks to go back to the previous pages. Otherwise, confirm your payment information and click on Pay.

You will see a green check mark when your payment is successful. A receipt will be emailed to the email address you provided.

Step 1:
Select the "Make a Payment" link below the "Finances" section of the Student Center.

Step 2:
Click on the "Make a Payment" button

Step 3:
Select Make a payment.

Step 4:
Enter the amount you would like to pay. If you have outstanding charges, the full amount due will already be populated for you. To modify the amount, enter the amount you wish to pay in the Amount field. If you need to restrict your payment towards a specific charge, such as an Installment Plan Payment or Housing Payment, you may select those options in the lower half of the screen. When you have selected all items you would like to pay, click Continue.

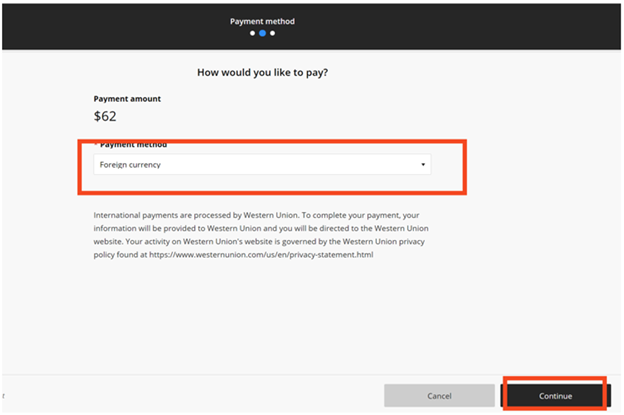
Step 5:
Select payment method Foreign Currency and click Continue. You will be taken to the Convera website to complete your transaction.
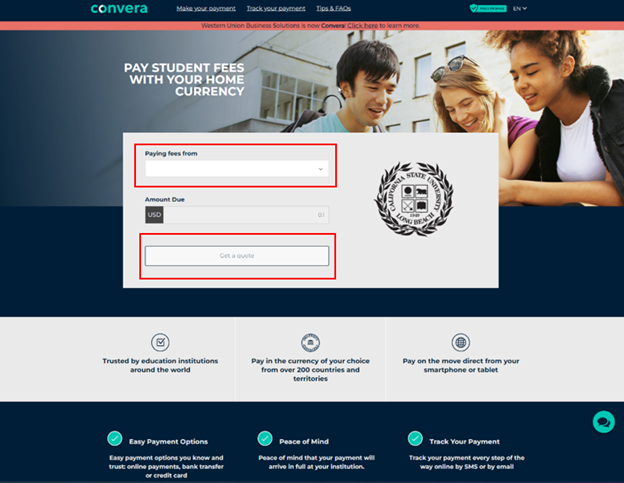
Step 6:
On the next page, select the country from which the payment will be made, then click "Get a Quote."
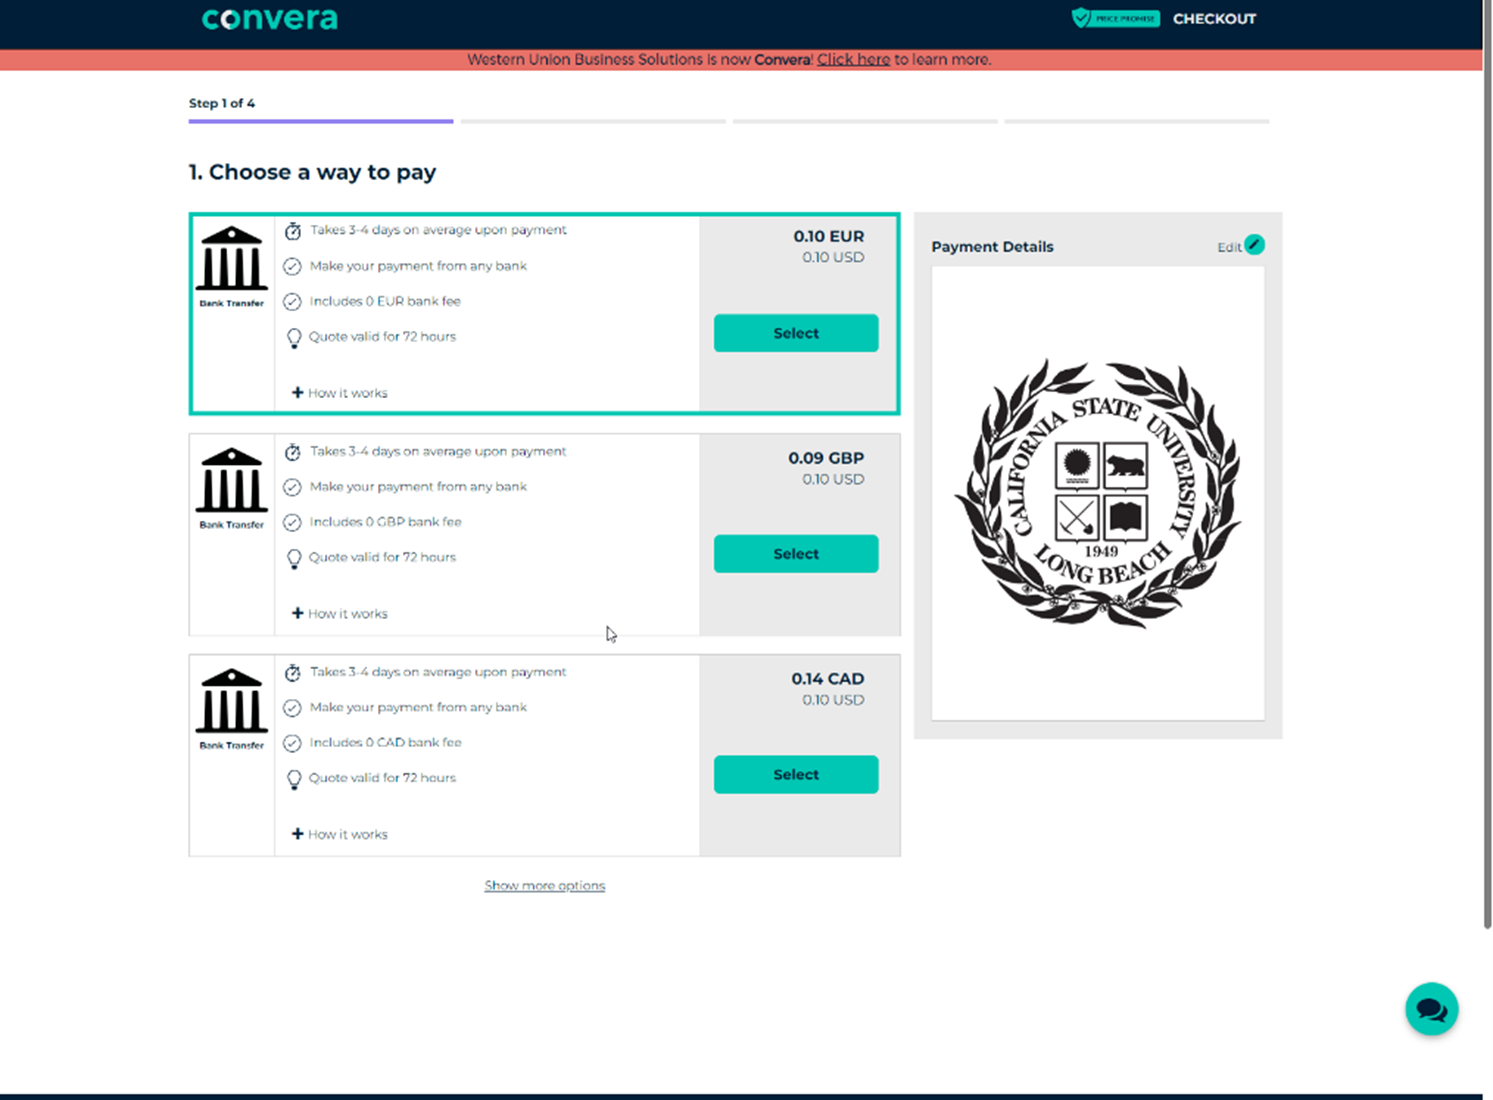
Step 7:
Choose a way to pay by selecting one of the payment options below and click "Select."
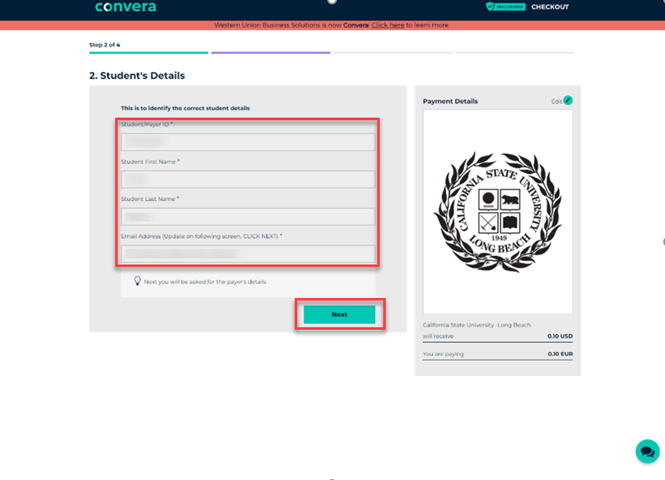
Step 8:
Fill out the required fields pertaining to the student and click "Next."
Step 9:
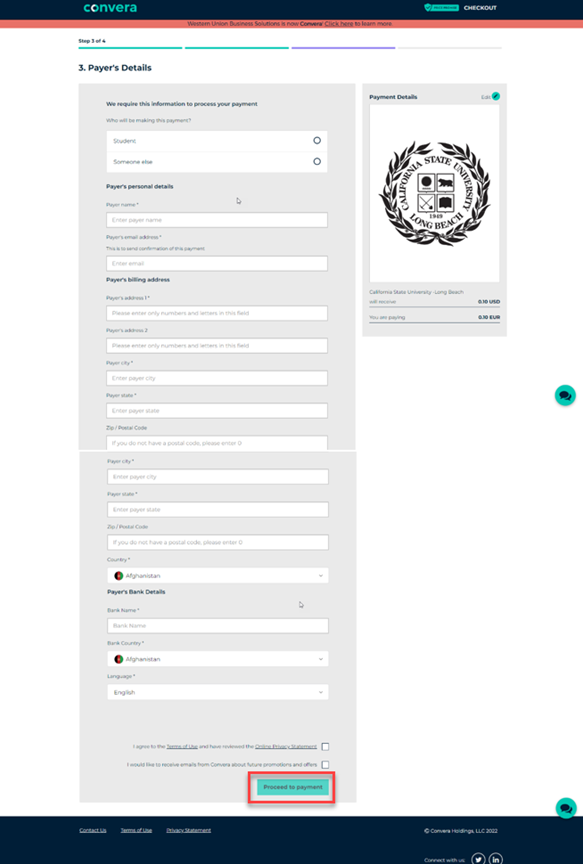
Next, provide the payer information. Select "Someone else" if anyone other than the student will complete the transaction, then select the relationship to the student. Complete the payer information fields and click "Proceed to Payment."
Step 10:
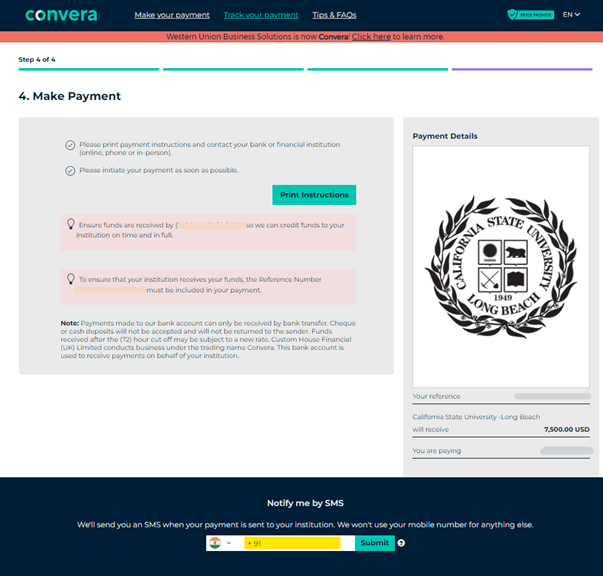
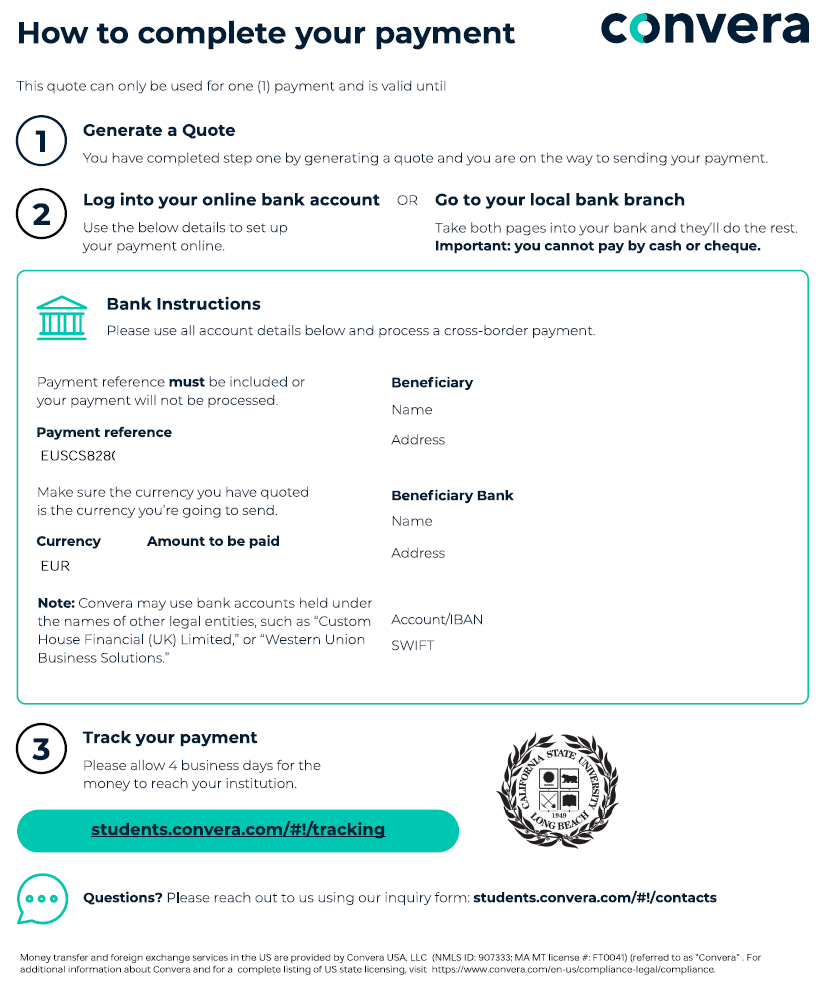
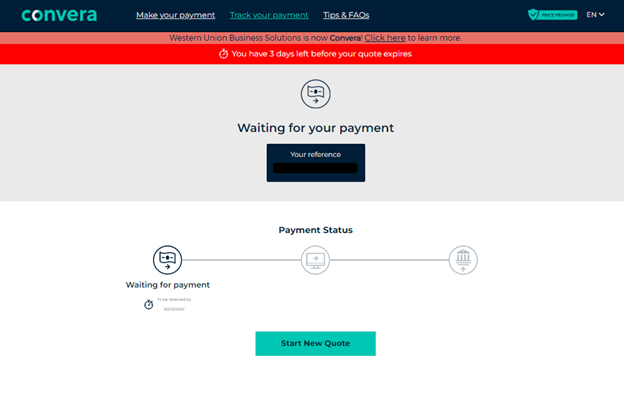
Once the transaction has been submitted, click "Print Instructions." The link will include the bank account and SWIFT information that must be provided to the bank in order to process the transfer of funds. An email with this information will also be sent to the payee email address provided. Payees will have 72 hours to complete their transaction to secure the conversion rate given at the time.
Below is a sample image of what will be generated for the student. Please note that the bank information generated can vary depending on the country the funds are coming from and that the "Pay Online" option may not be available for some students.
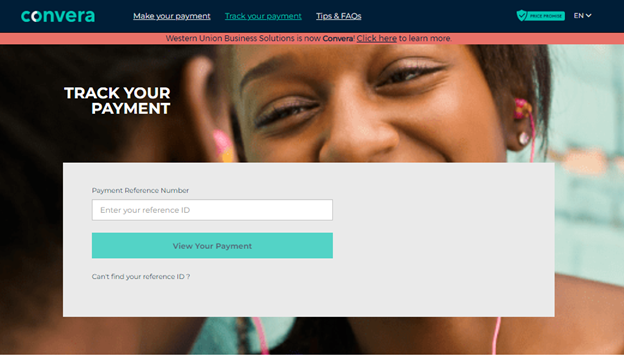
NOTE: Students can also track their payments through the same site by clicking the "Track Your Payment" link. Input your reference number and select "View Your Payment."
On-Demand Video for How-to Sign Up For E-Refund (SSO)
CSULB students are encouraged to sign up for e-Refund, which electronically deposits any refunds, including financial aid disbursement refunds, directly into your bank account. This is a faster and safer way to receive your funds. The sign-up instructions for all students can be found below.
Enroll or re-enroll in E-Refund
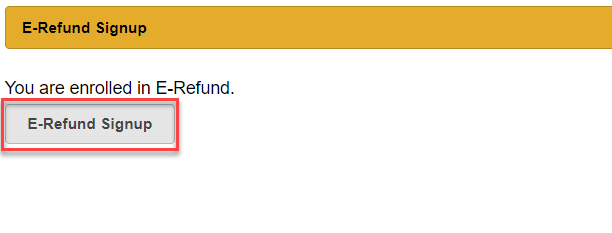
In the Student Center of MyCSULB, click on E-Refund Signup in the Finances Section:

Click on E-Refund Signup
From the Overview page, select the My Account tab

Under Direct Deposit Refunds, select Sign Up

Read the Direct Deposit terms and conditions. Check the box “I agree to these terms”. You may choose to print the terms and conditions (optional) by selecting the Print icon at the top right. When you are done, click Continue

Select New bank account to enter new banking information. If you have payment methods saved, you can select to use one of those accounts. Then select Continue

Enter the following required information (below) and click Continue:
- Account Holder Name
- Account Type (Checking or Savings)
- Routing Transit Number
- Bank Account Number
- Confirm Bank Account Number
- Bank Account Nickname


If you are unsure about where to find your banking information, you can click on either of the Information icons. This will provide you with a sample of where to find account information on a check. If you are still unsure, you can contact your banking institution for instructions.


After clicking Continue, review the entered information for accuracy. If you need to make changes, select Change. If the information is correct, select Complete:

You will see a green check mark when the update is successful

Your account will now be displayed under E-Refunds on the My Account page

Editing or Modifying Existing Account Information
To modify or change the bank account used for eRefunds, select the Edit icon to modify the bank account information.

You will only be able to see the last four digits of the current account used for eRefunds. To enter a new bank account, or switch to another existing account, click Change. To edit the existing account number used, select the Edit icon to change the information for the current account

Withdrawing from E-Refund
To Withdraw from E-Refund, click on E-Refund Signup.
On the My Account tab, go to the Direct deposit refunds section and select the Edit icon

Select Cancel direct deposit refunds

Select Keep It to stay enrolled in eRefunds, or select Cancel direct deposit refunds to withdraw

A green check mark will show when the update is successful

Your status will now be withdrawn with the prompt Sign Up

On-Demand Video for How-to Enroll in a Payment Plan (SSO)
Step 1:
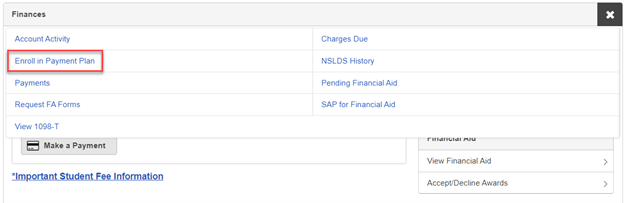
In the Finances section of the Student Center, select the navigation menu and choose "Enroll in Payment Plan".

Step 2:
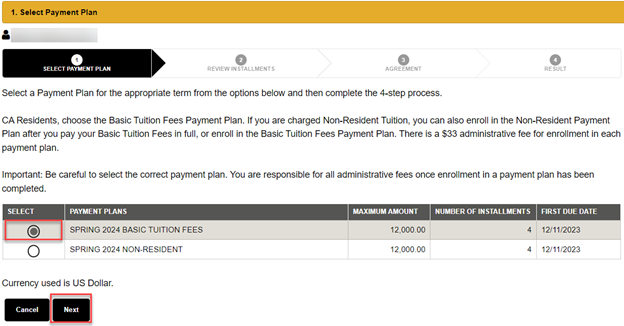
Select Payment Plan. Click on the radio button under Payment Plans to select the available payment plan. Then click on the “Next” button to continue.
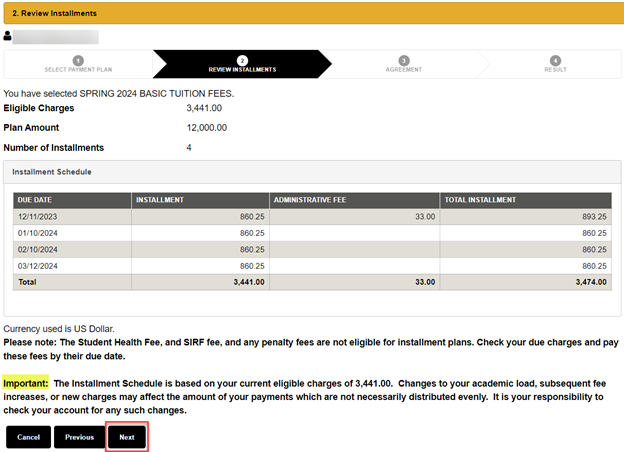
Step 3:
Review Installments - Review installment dates and amounts. Read the note at the bottom marked “Important.” Then click on the “Next” button to continue.
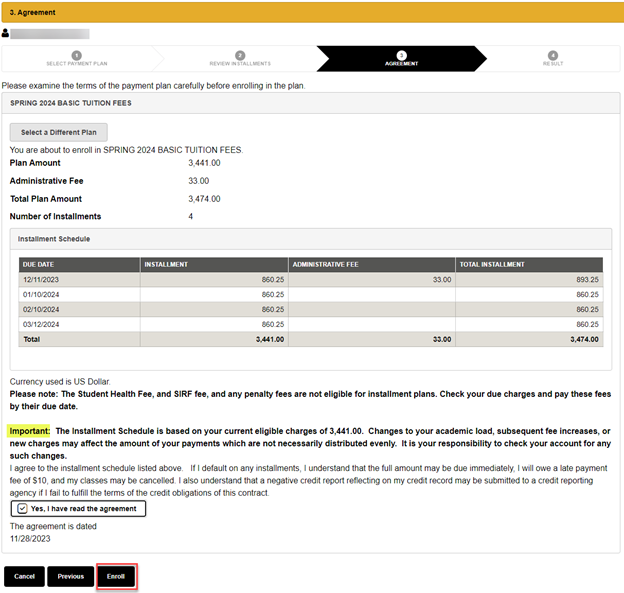
Step 4:
Agreement - review installment information, notes and the agreement at the bottom. Click the "Yes" box to agree. Then click on the "Enroll" button to continue.
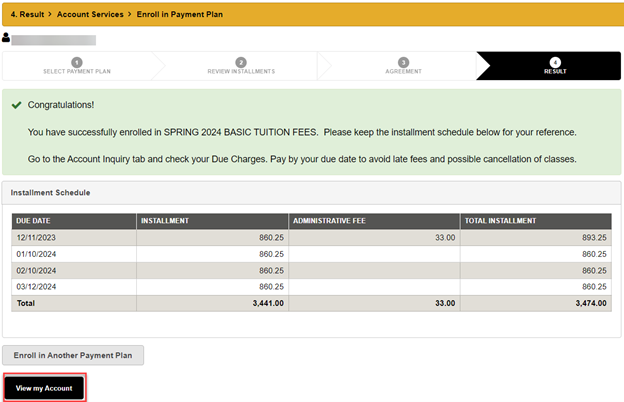
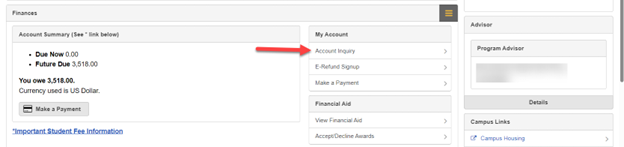
Step 5:
Result - you are now enrolled. Review your installment due dates and amounts. To see charges not covered by the payment plan, click on the "View My Account" button.
How-To Opt Out of the (SIRF) Student Involvement Representation Fee Tutorial
Step 1:
Click on the Account Inquiry link under the Finances section of your Student Center.
Step 2:
Click on the Activity tab.
Step 3:
Click on the information icon next to the SIRF-Student Involv & Repr Fee to learn more about the Student Representation Fee.
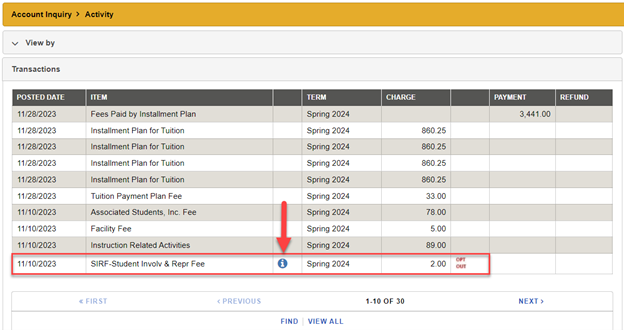
You can also access more information on the CSSA Website.

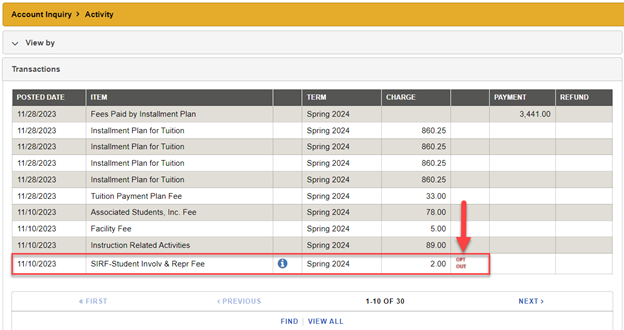
Step 4:
If you choose to ‘Opt Out’ of paying for the Student Representation Fee, click on the ‘OPT OUT’ icon to the right of the fee.
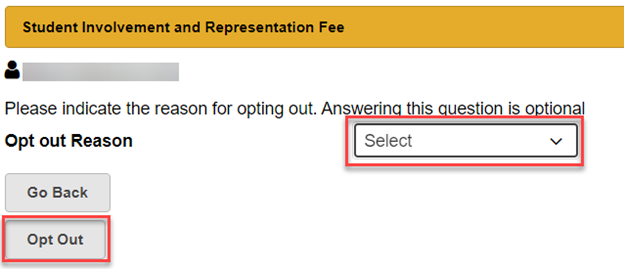
Step 5:
Select your Opt Out Reason, then click the Opt Out button.
Video on How to View and Print Form 1098-T
Step 1:
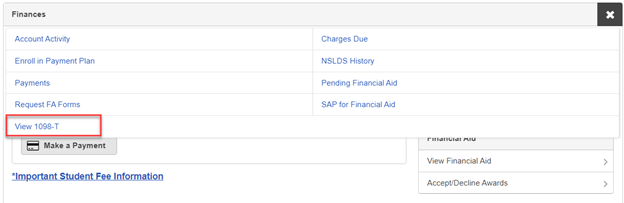
From the Finances section of the Student Center, click on the navigation menu and choose the "View 1098-T".
Step 2:
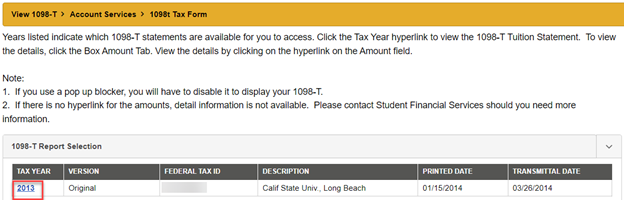
Click the tax year hyperlink to view the 1098-T Form you wish to view, for example, 2017.
You can provide consent to allow CSU Long Beach to disclose confidential information from your education records to parents, spouses, or other third parties. In your Student Center, you can specify what information can be released and which individuals are authorized to receive this information. For instructions, review the FERPA Information Release guide.
Video on How To Add An Authorized Payer
DISCLAIMER: Please note this IS NOT intended to be used for students that receive payments via a THIRD-PARTY organization, agency, or sponsor. For questions about third party payments, please contact Sponsorships@csulb.edu.
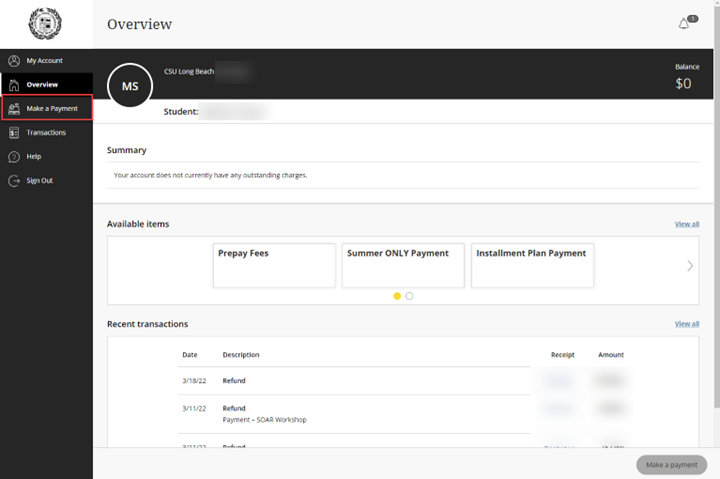
Step 1: Go to the MyCSULB Student Center and select “Make a Payment”.

Step 2: Click on “Make a Payment” on the next screen to be connected to the payment portal.
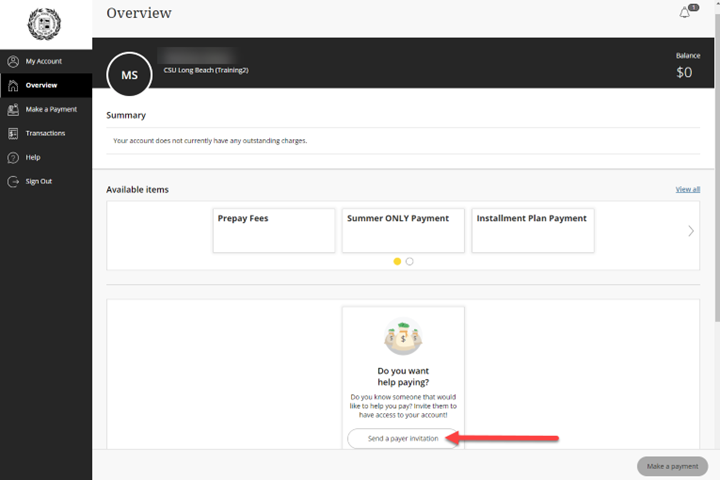
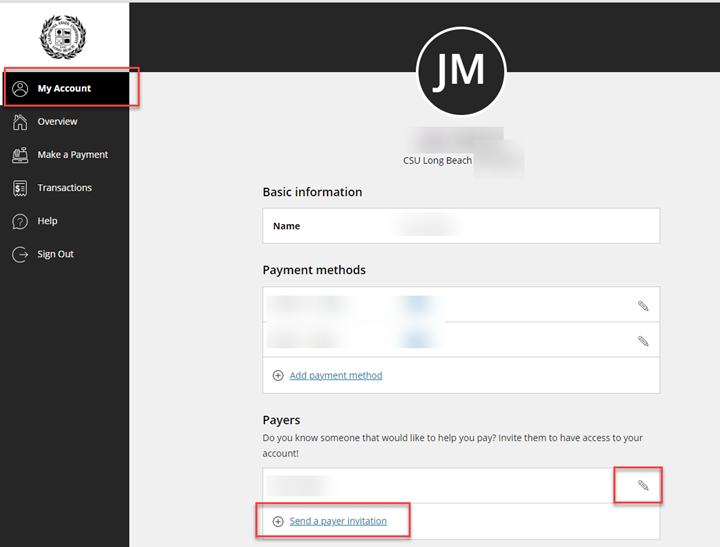
Step 3: Once you’re on the payment page, click “send a payer invitation “in the tile that states “Do you want help paying?”.
Step 4: On the right side of the screen, a window will appear that will allow you to enter your authorized payer invitation information. Once the fields are complete, click “Send Invitation”.
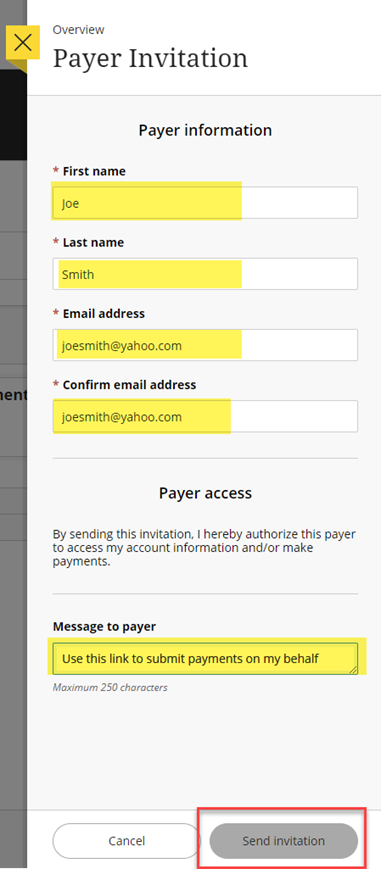
Step 5: A confirmation will appear on screen after your invitation has been successfully sent.

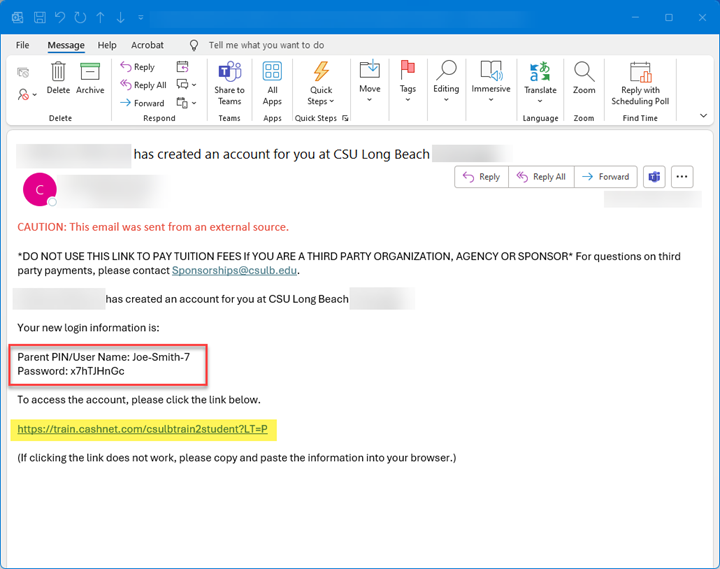
Step 6: The intended invitee will receive an email like the example below acknowledging them as an authorized payer for the student. The email will contain a Parent PIN/User Name and a temporary password. A link at the bottom of the email will allow the authorized payer to submit payments towards the student’s fees.
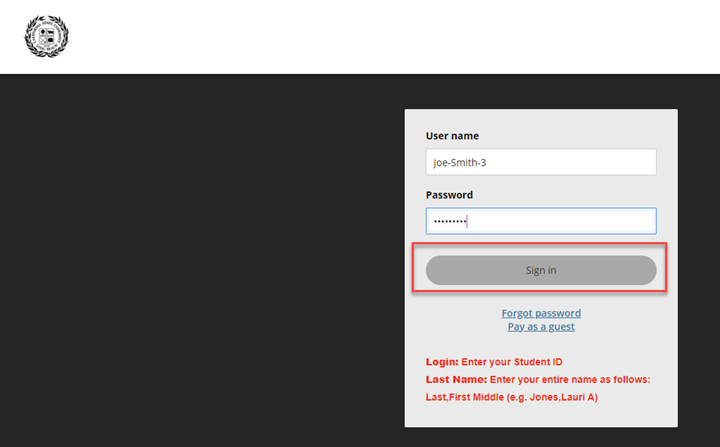
Step 7: After clicking the payment link in the email, the authorized payer will be sent to the payment portal where they will be asked to provide their credentials from the email, then click “Sign In”.
*It is recommended that you save or bookmark this link on your web browser for abridged access*
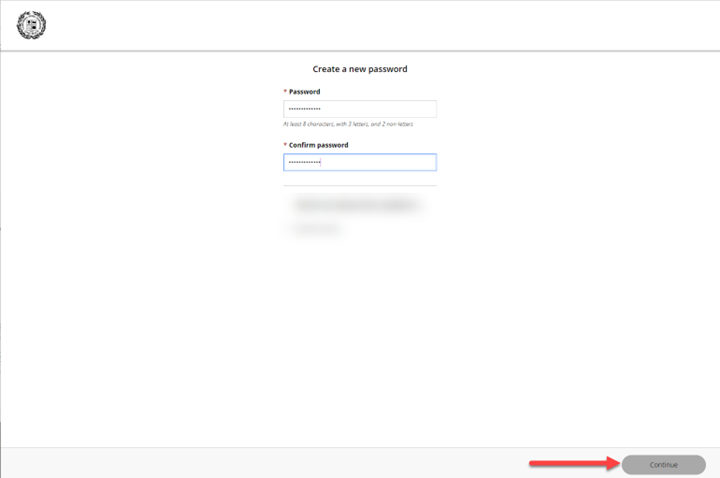
Step 8: On the next page, the authorized payer will be prompted to create a new, unique password. Once completed, click “Continue” on the bottom right-hand side of the screen.
Step 9: The authorized payer can now access the student payment portal and make payments towards balances on a student account by selecting “Make a Payment” on the left side of the webpage.
To edit, remove or add an additional authorized payer, the student can click on “My Account” and go to the “Payers” section where you can add an additional payer or click the pencil to edit or remove an existing payer.
*Please note, not all 529 payment providers are offered through this payment method. Alternative 529 payment instructions can be found at the bottom of this guide.
Click to view a list of 529 Savings Plan Providers offered for this payment method.
Step 1: Once you are on the CSULB payment site, select the items for payment, enter the amount, and then click Continue.
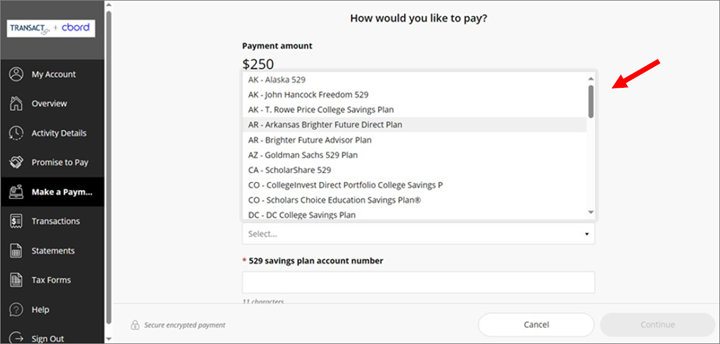
Step 2: In the payment method screen, click "New 529 Savings Plan".

Step 3: From the dropdown menu, select your 529 savings plan.
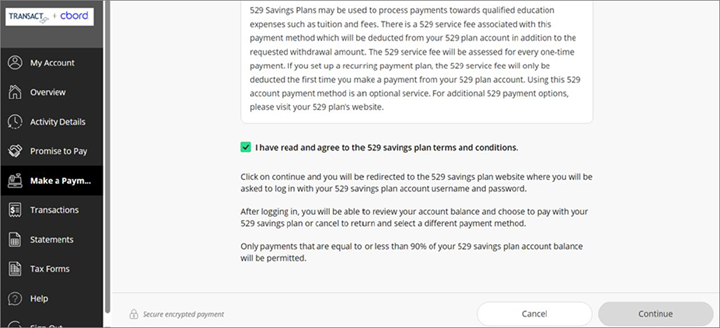
Step 4: Provide the 529 plan number. If you would like to use this payment method in the future, please check the box next to “Save 529 savings plan for future use”.

Step 5: Read the terms and conditions and indicate your agreement by selecting the checkbox.
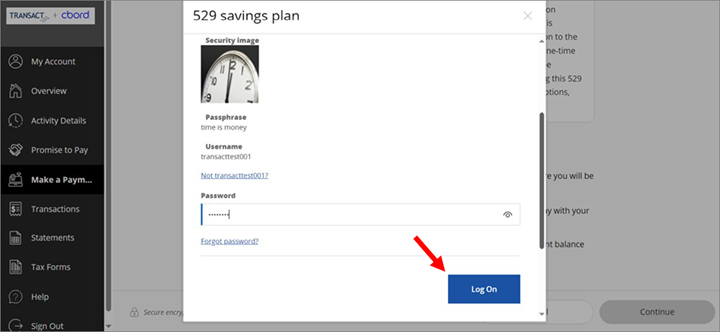
Step 6: In the 529 Savings Plan modal window, enter your username and password, and then click Log On.
Step 7: Review the amount available in the plan and authorize the payment by select “I Authorize”.
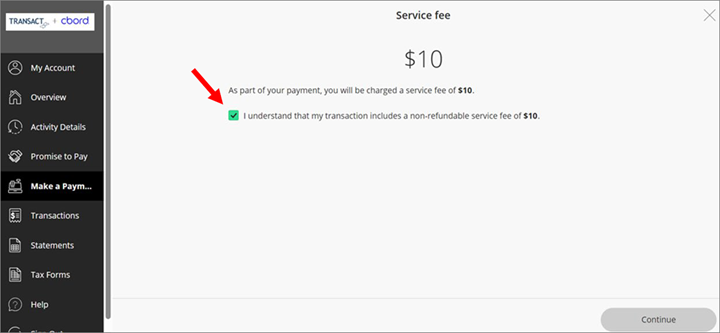
Step 8: Select the “I understand that my transaction includes a non-refundable service fee” checkbox and then click Continue.
Step 9: If the payment is authorized, a confirmation message is displayed showing your remaining balance. To view the receipt online, click on the receipt number.

Step 10: Provide the 529 plan number. If you would like to use this payment method in the future, please check the box next to “Save 529 savings plan for future use”.

If your 529 plan is not available through the student portal, please follow the instructions below.
529 Education Savings Plan
Instruct plan to include the following:
- Make checks payable to CSULB, not the beneficiary
- Include the name and the student ID number
- Mail to the address below:
California State University, Long Beach
Attn: Cashier's Office BH-148
1250 Bellflower Blvd
Long Beach, CA 90840
*Please note that funds received in excess of the amount due will not be accepted and may be returned to the savings plan.
For more information on 529 Plans, please contact the Cashier's Office at cashiers@csulb.edu.